List Disks in Linux with lsblk: Partitions & Filesystems
Updated
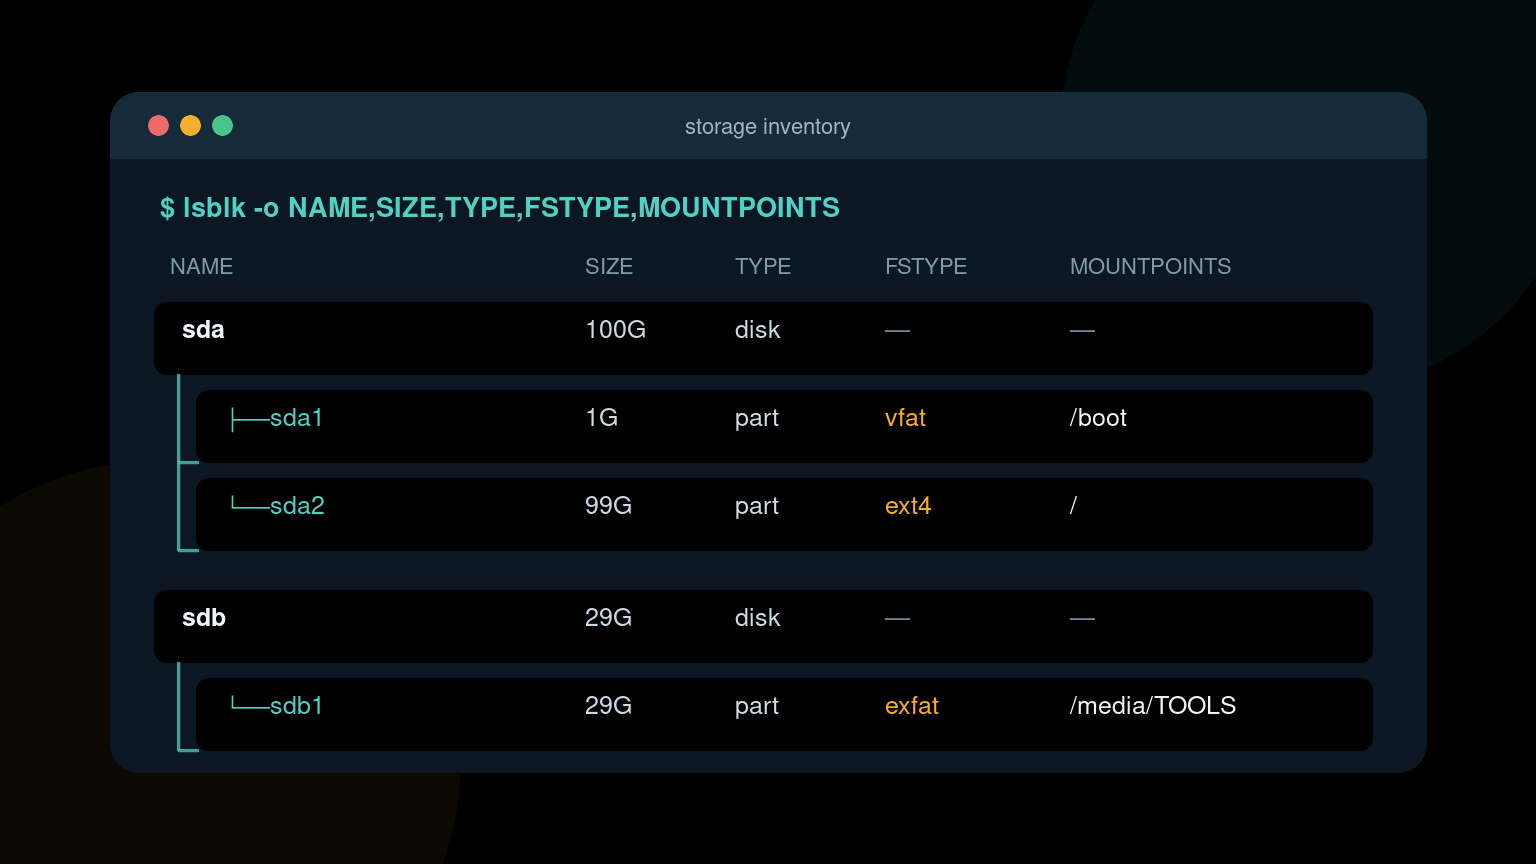
The Linux lsblk command lists block devices such as disks, partitions, logical volumes, and removable drives. It shows how those devices relate to each other, which makes it one of the safest first commands to run before troubleshooting storage.
Start with:
lsblkFor a more useful helpdesk inventory, run:
lsblk -o NAME,SIZE,TYPE,FSTYPE,LABEL,MOUNTPOINTSBoth commands are read-only. They help answer the important first question: What storage does Linux currently see, and where is it mounted?
Quick lsblk command reference
| Goal | Command |
|---|---|
| List block devices as a tree | lsblk |
| Show filesystems and UUIDs | lsblk -f |
| Show full device paths | lsblk -p |
| Show selected columns | lsblk -o NAME,SIZE,TYPE,FSTYPE,MOUNTPOINTS |
| Include empty devices | lsblk -a |
| Exclude loop devices | lsblk -e 7 |
| Show one device and its children | lsblk /dev/sdb |
| Output JSON for scripts | lsblk -J |
| Show SCSI transport details | lsblk -S |
Plain lsblk is usually the right opening move. Add columns when you know which question the ticket needs answered.
How to read lsblk output
A basic result may look like this:
NAME        MAJ:MIN RM   SIZE RO TYPE MOUNTPOINTS
sda           8:0    0   100G  0 disk
├─sda1        8:1    0     1G  0 part /boot
└─sda2        8:2    0    99G  0 part /
sdb           8:16   1  28.7G  0 disk
└─sdb1        8:17   1  28.7G  0 part /media/tech/TOOLS
nvme0n1     259:0    0   477G  0 disk
└─nvme0n1p1 259:1    0   477G  0 part /srv/data
The tree lines matter. They show parent and child relationships:
sdais a disk with two partitions,sda1andsda2;sdbis a removable disk becauseRMis1;nvme0n1is an NVMe device, with partitionnvme0n1p1beneath it;TYPEdistinguishes disks, partitions, logical volumes, RAID devices, and other layers;MOUNTPOINTSshows where filesystems from a device are attached to the directory tree.
RO means read-only at the block-device layer when it is 1. It does not describe normal file permissions, and a zero does not guarantee that the mounted filesystem itself is writable.
Show filesystem details with lsblk -f
Use -f when the filesystem identity matters:
lsblk -fTypical columns include:
FSTYPE: filesystem type, such asext4,xfs, orvfat;FSVER: filesystem version when available;LABEL: human-readable filesystem label;UUID: filesystem identifier commonly used in/etc/fstab;FSAVAIL: available space on a mounted filesystem;FSUSE%: percentage used;MOUNTPOINTS: one or more current mount locations.
For a ticket-friendly view, request the columns explicitly:
lsblk -o NAME,SIZE,FSTYPE,LABEL,UUID,FSAVAIL,FSUSE%,MOUNTPOINTSExplicit columns make the output easier to read and reduce surprises when util-linux versions choose different defaults.
A blank FSTYPE does not always mean the disk is unused. The device may contain an LVM physical volume, encrypted storage, RAID metadata, an unsupported filesystem, or no recognizable signature. Investigate the storage layers before deciding it is safe to format.
Show full device paths
By default, lsblk prints names such as sda1. Add -p to show /dev/ paths:
lsblk -pYou can combine it with a custom layout:
lsblk -p -o NAME,SIZE,TYPE,FSTYPE,MOUNTPOINTSFull paths are useful in ticket notes and when comparing output with findmnt, blkid, or /etc/fstab. Still, device names such as /dev/sdb are not guaranteed to remain assigned to the same physical disk after hardware or boot-order changes. Use UUIDs or other stable identifiers where persistent configuration requires them.
Hide loop devices from a busy listing
Desktop and container systems can have many loop devices. To exclude major device number 7, run:
lsblk -e 7This makes a human review cleaner, especially on Ubuntu systems with several snap packages. Do not blindly copy that filter into every diagnostic script. A loop device can be relevant when investigating mounted images, packages, or container storage.
To include devices that have no sectors, use:
lsblk -aThat can expose empty removable-media readers or other devices omitted from the default output.
Inspect one disk
If the full tree is crowded, target one device:
lsblk /dev/sdbThen add the fields needed for the case:
lsblk -o NAME,SIZE,TYPE,FSTYPE,LABEL,UUID,MOUNTPOINTS /dev/sdbTargeting one disk reduces noise, but confirm the device path before using it. A ticket saying “USB drive is /dev/sdb” may be stale after a reboot or after another device was connected.
A practical USB drive helpdesk workflow
Suppose a user connects a support USB drive, but it does not appear in the file manager.
1. Capture the current block-device tree
lsblk -o NAME,SIZE,RM,TYPE,FSTYPE,LABEL,MOUNTPOINTSLook for a new device with the expected approximate size. RM=1 is helpful evidence, but some USB-attached storage reports removable status differently.
2. Reconnect the drive and compare
Run the same command before and after reconnecting the device. A new sdb and sdb1 branch proves the kernel created block devices for the hardware.
If nothing new appears, check USB and kernel detection instead:
lsusb
dmesg --follow
The lsusb guide covers USB bus detection, while the dmesg guide explains how to inspect kernel hardware messages.
3. Check the filesystem identity
lsblk -f /dev/sdbReplace /dev/sdb with the device you actually observed. Record the filesystem type, label, UUID, and mount point. Do not assume the first removable-looking disk is the user’s drive.
4. Check whether it is mounted
findmnt -S /dev/sdb1If the partition has no mount point, that explains why its files are unavailable through the directory tree. It does not explain why mounting failed. The next checks may involve filesystem support, policy, encryption, permissions, or kernel messages.
5. Write a useful ticket update
A solid note could say:
Reconnecting the 29 GB USB drive creates
/dev/sdband partition/dev/sdb1.lsblk -fidentifies an exFAT filesystem labeledTOOLS, but no mount point is present. USB and block-device detection are working; investigating the mount failure next.
That note separates hardware detection from filesystem mounting. “USB does not work” makes the next technician repeat the entire first pass.
lsblk versus blkid, findmnt, df, and fdisk
These tools answer different storage questions:
| Question | Best first command |
|---|---|
| What disks, partitions, and storage layers exist? | lsblk |
| What filesystem identity is on a device? | blkid |
| What is mounted at a path or from a source? | findmnt |
| How much space is used on mounted filesystems? | df -h |
| What is the detailed partition-table layout? | sudo fdisk -l |
Start with lsblk because it is readable and normally does not need elevated privileges. Move to a more specific tool when the device tree points to the next question.
df lists mounted filesystems, not every physical disk. A disk can appear in lsblk and remain absent from df because it is not mounted. That difference is often the clue, not a contradiction.
Use JSON output in scripts
For automation, request JSON instead of scraping the visual tree:
lsblk -J -o NAME,PATH,SIZE,TYPE,FSTYPE,MOUNTPOINTSThe result includes a blockdevices array and nested children. JSON preserves the device relationships without relying on tree characters or column spacing.
Always specify the columns a script expects. The lsblk manual warns that default output can change, so scripts should not depend on the default column set. Test against the util-linux versions used in your environment and handle null values.
Common beginner mistakes
Assuming the biggest disk is the right disk
Size is supporting evidence, not identity. Compare model, serial, transport, filesystem label, UUID, platform inventory, and the before/after device tree when appropriate.
Confusing a disk with a partition
/dev/sdb is commonly the whole disk, while /dev/sdb1 is its first partition. Mounting, filesystem, and repair commands usually target a specific layer. Confirm TYPE and the tree before acting.
Treating a blank mount point as a broken disk
A device can be healthy and intentionally unmounted. lsblk reports state; it does not diagnose the policy or reason behind that state.
Expecting lsblk to show only physical hardware
Device-mapper volumes, LVM logical volumes, RAID devices, loop devices, and encrypted layers can all appear. The tree is designed to show these relationships.
Jumping from inspection to destructive commands
lsblk, blkid, and findmnt are safe inspection tools. Commands such as mkfs, partition editors, filesystem repair tools, and volume-management changes can destroy data or interrupt service. Do not run them merely because a device has an unfamiliar or blank field.
Practice reading storage before changing it
The useful skill is not memorizing one command. It is learning to map the storage tree, distinguish disks from partitions and logical layers, identify filesystems, verify mounts, and write evidence-based ticket notes before making changes.
Practice Linux storage and troubleshooting commands in Shell Samurai. It gives you a safe terminal environment to build that habit without guessing on a user’s disk.
FAQ
What does lsblk show in Linux?
lsblk shows block devices and their relationships, including disks, partitions, logical volumes, removable drives, and mount points. Optional columns can also show filesystem, capacity, transport, and identity details.
Does lsblk need sudo?
Basic lsblk output normally does not require sudo. Some attributes may be unavailable to an unprivileged account, but start without elevation and request only the information the investigation needs.
How do I list disks and partitions in Linux?
Run lsblk. Use lsblk -o NAME,SIZE,TYPE,FSTYPE,MOUNTPOINTS for a focused disk, partition, filesystem, and mount-point view.
How do I show UUIDs with lsblk?
Run lsblk -f, or specify them directly with lsblk -o NAME,FSTYPE,LABEL,UUID,MOUNTPOINTS.
Why does lsblk show a disk that df does not?
lsblk lists block devices, while df reports mounted filesystems. An unmounted disk or partition can appear in lsblk without appearing in df.
Practice This in a Real Terminal
Shell Samurai gives you safe Linux missions so the commands actually stick. Chapter 1 is free; the full practice path is a one-time purchase, not another subscription.